
How to Start Cooking on Your Ceramic Hob 🍲
Applies for units Lyfe 1206 and Hyde House R402
🟢 To Start Cooking
After powering on, the buzzer will beep once, and all indicators will light up for 1 second before going out. This indicates the hob is in standby mode (state 0).
Turn on the hob
Touch the ON/OFF control. All indicators will show “–”.
Place your cookware
Place 2 suitable pans on the cooking zones you wish to use.
Ensure the bottom of the pans and the cooking surface are clean and dry.
Heating zone control
This is for indication only, no need to touch.
Set the power
Touch the “+” or “–” buttons to select the desired power level.
⚠️ Notes:
If you don’t select a heat setting within 1 minute, the hob will automatically switch off. You will need to start again from step 1.
You can modify the heat setting at any time during cooking.
🔴 When You Have Finished Cooking
Turn off the cooking zone
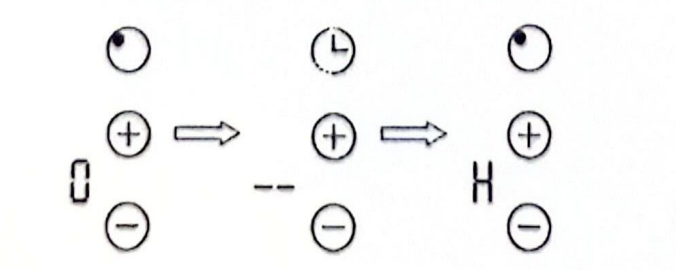
Touch the “–” button until it shows “0”. Ensure the display shows 0.
Beware of hot surfaces
“H” will appear on the display to indicate a hot cooking zone.
The “H” disappears when the surface has cooled to a safe temperature.
You can use the residual heat to save energy by heating other pans.
Turn off the entire hob
Touch the ON/OFF control.
🔒 Locking the Controls
You can lock the controls to prevent unintended use (e.g., children accidentally turning on the hob).
When locked, all controls except ON/OFF and Stop&Go are disabled.
To Lock the Controls
Touch the keylock 🔒 control.
The timer indicator will show “Lo”.
To Unlock the Controls
Ensure the hob is turned on.
Touch and hold the keylock control for a few seconds.
You can now use the hob as normal.
⚠️ Important: When the hob is locked, all controls are disabled except ON/OFF ⏲️ and Stop&Go. You can always turn the hob off in an emergency, but you must unlock it before the next operation.
▶️ Stop&Go Control
Touch the heating zone selection control.
Touch the ▶️ key to stop that zone.
The LED will show “11”.
To restart, touch the ▶️ key again.
🌡️ Over-Temperature Protection
A sensor continuously monitors the hob surface temperature.
If an excessively high temperature is detected, the hob will automatically switch off.
Once the surface cools down, the hob will resume normal operation.
⚠️ Residual Heat Warning
After operating, residual heat remains on the hob.
“H” appears on the display to warn you to keep away from hot surfaces.
⏱️ Auto Shutdown
If a cooking zone is forgotten and left on, the hob will automatically shut down.
Default shutdown times vary depending on the power level and are shown in the hob’s user manual table below:

⏱️ Using the Timer
The timer allows you to set one or more cooking zones to turn off automatically after a set time.
You can set the timer for up to 99 minutes.
If the time exceeds 99 minutes, the timer will automatically reset to 0.
Setting the Timer to Turn Off a Cooking Zone
Turn on the heating zone and set the desired time:
Touch the “+” or “–” buttons to select the timer.
Hint:
Touching the “+” or “–” once will increase or decrease the time by 1 minute.
Touch and hold the “+” or “–” will increase or decrease by 10 minutes.
Activate the timer
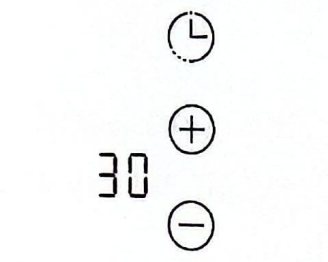
Touch the timer control ⏱️.
The timer indicator will display the set time (e.g., “30”).
Cancel the timer
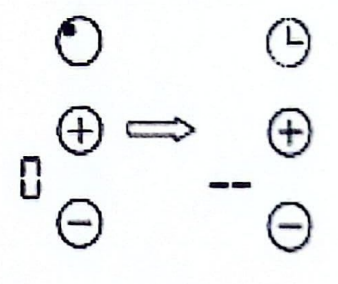
Hold the “–” button until the display shows “00”.
The “–” will appear in the minute display, indicating the timer is canceled.
Timer countdown
Once set, the timer begins counting down immediately.
The display shows remaining time, and the timer indicator flashes for 5 seconds.
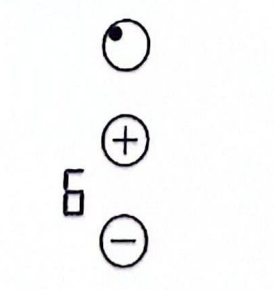
NOTE: The red dot next to the power level indicator will illuminate, indicating that the zone is selected.
Timer completion
When the set time ends, the buzzer beeps for 30 seconds.
The timer indicator will show “- -”, and the cooking zone will switch off automatically.
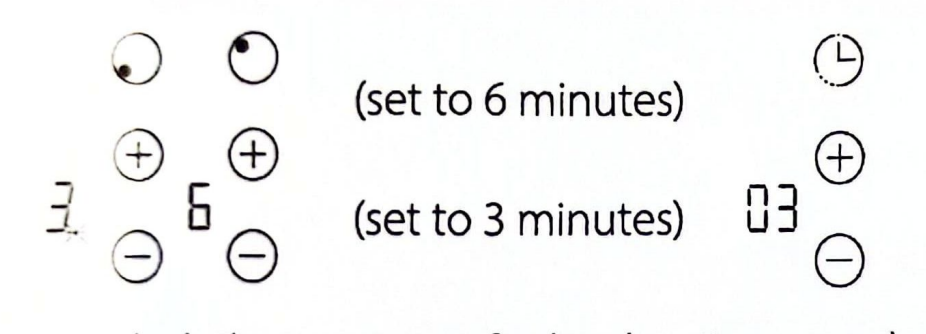
Setting the Timer for Multiple Cooking Zones
If more than one zone uses the timer, the timer indicator shows the shortest set time.
Example: Zone 1 = 3 min, Zone 2 = 6 min → timer shows “3”
The red dot next to the power level will flash.
To check the set time for other zones, touch “+” or “–”.
When a timer expires, the corresponding zone switches off and shows “H” for residual heat.
⚠️ Note: To change a timer after setting it, start from step 1.
⚠️ Note: To change a timer after setting it, start from step 1.
🍳 Cooking Steps
Preheat the pan briefly and add 2 tablespoons of oil.
Cook meat first, then remove and keep warm.
Stir-fry vegetables until hot but still crisp.
Lower the heat, return the meat to the pan, and add your sauce.
Stir gently to ensure everything is heated through.
Serve immediately.
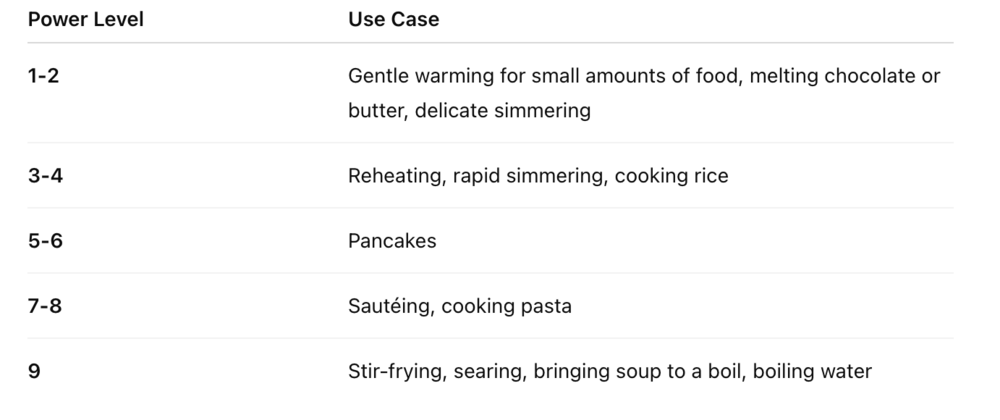
🔥 Heat Settings Guide