USING YOUR CERAMIC HOB 🍲
Applies for units Hyde 1206 and Hyde House R402
To start cooking
After powering on, the buzzer beeps once, and all the indicators light up for 1 second and then go out, indicating that the ceramic hob has entered the state 0 standby mode.
Touch the ON/OFF control. all the indicators show "-"
Place 2 suitable pan on the cooking zone that you wish to use. Make sure the bottom of the pan and the surface Of the cooking zone are clean and dry.
The heating zone control is only for indication, no need to touch.
To set the power By touching the button + or - to select the power level.
If you don't choose a heat setting within 1 minute the ceramic hob will automatically switch off. You will need to start again at step 1.
You can modify the heat setting at any time during cooking.
When you have finished cooking
1 Turn the cooking zone off by touching the - to “0”, make sure the display shows"0".
2. Beware of hot surfaces
‘H" will show which cooking zone is hot to touch. It will disappear 9, when the surface has cooled down to a safe temperature. It can © also be used as an energy-saving function if you want to heat H further pans, use the hotplate that is still hot.
3. Turn the whole cooktop off by touching the “ON/OFF” control.
LOCKING THE CONTROLS
You can lock the controls to prevent unintended use (for example children accidentally turning the cooking zones on).
When the controls are locked, all the controls except the ON/OFF and stop&go, control are disabled.
To lock the controls
Touch the keylock 🔒 control. The timer indicator will show “Lo "
To unlock the controls
Make sure the ceramic hob is turned on.
Touch and hold the keylock control for a while.
You can now start using your ceramic hob.
⚠️ When the hob is in the lock mode, all the controls are disabled, except the ON/OFF ⏲️ and stop&go, you can always turn the ceramic hob off with the ON/OFF ⏲️ control in an emergency, but you shall unlock the hob first in the next operation
Stop&go Controls
Touch the heating zone selection control, then touch the ▶️ , key, the ▶️ heating zone will stop working, LED show “11"If you want to restart to work touch the key again.
Over-Temperature Protection
A sensor installed in the hob continuously measures the temperature on the hob surface. If an excessively high temperature is detected, the hob will be automatically switched off. When the temperature on the hob surface returns to normal, the ceramic becomes operational again
Residual Heat Warning
When the nob has been operating for some time, there will be some residual heat. The letter “ H "appears to warn you to keep away from it.
Auto Shutdown
Another safety feature of the hob is auto shutdown. This occurs whenever you forget 10 switches off a cooking zone. The default shutdown times are shown in the table below:

USING THE TIMER
You can use the timer to set it to turn one cooking zone off or more than one after the set time is up.
You can set the timer for up to 99 minutes. If the setting time exceeds 99 minutes, the timer will automatically return to 0 minute.
Setting the timer to turn one cooking zone off
1. To turn on the heating zone and set the time by touching the + or - to select the timer.
Hint: Touch the "-" or "+" control of the timer once will decrease or increase by 1 minute.Touch and hold the "-" or "+" control of the timer will decrease or increase by 10 minutes
2 Touch the timer control ⏱️, and the timer indicator shows “30”
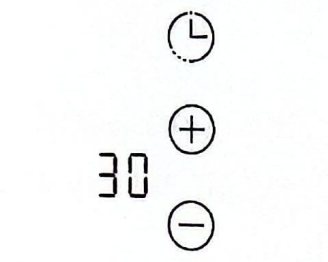
3. Hold the “-" to show “00”, the timer is canceled, and the "-" will show in the minute display.
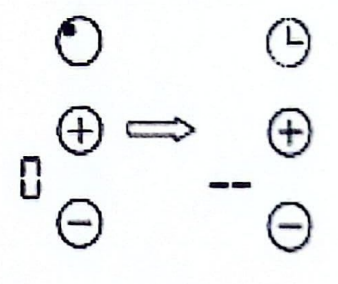
When the time is set, it will begin to count down immediately. The (display will show the remaining time and the timer indicator flash for 5 seconds.
NOTE: The red dot next to power level indicator will illuminate indicating that the zone is selected.
Buzzer will beep for 30 seconds and the timer indicator shows "- - “ when the set time is finished.
Setting the timer to turn more than one cooking zone off
If more than one heating zone uses this function, the timer indicator will show the lowest time.
(e.g zone 1# setting time of 3 minutes, zone 2# setting time of 6 minutes, the timer indicator shows "3").
NOTE: the red dot next to power level indicator will flash.
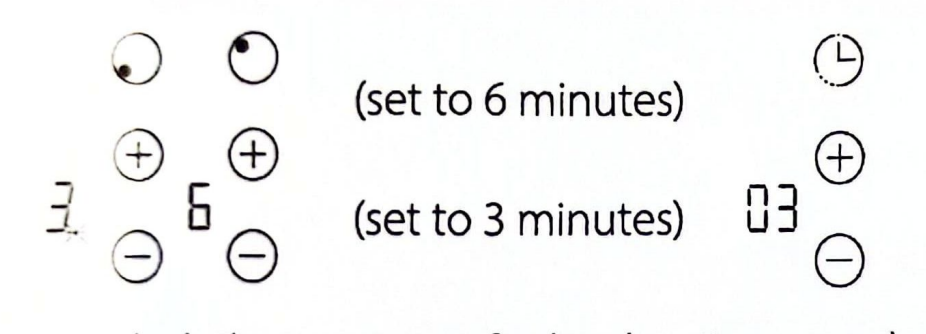
if you want to check the set time of other heating zones, by touching the + or -the timer will indicate its set time
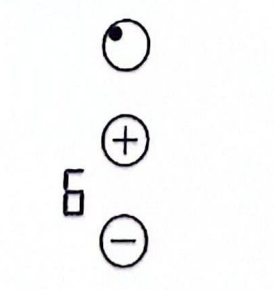
2. When the cooking timer expires, the corresponding cooking zone will be switched off automatically and show “H"
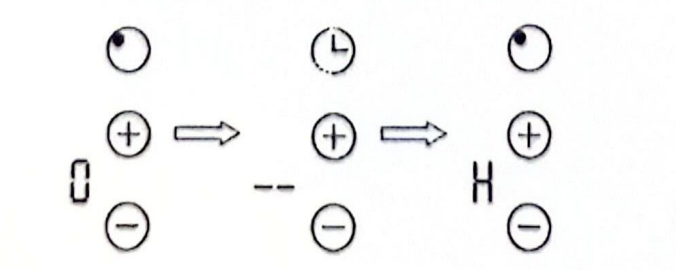
Note
if you want to change the time after the time is set, you have to start from step 1.
3. Preheat the pan briefly and add two tablespoons or oil.
4. Cook any meat first, put it aside, and keep warm.
5. Stir-fry the vegetables. When they are hot but still crisp, turn the cooking zone to a lower setting, return the meat to the pan, and add your sauce.
6. Stir the ingredients gently to make sure they are heated through.
7. Serve immediately.
HEAT SETTINGS
1-2
delicate warming for small amounts of food
melting chocolate, butter, and foods that burn quickly
gentle simmering
slow warming
3-4
reheating
rapid simmering
cooking rice
5-6
pancakes
7-8
Sauteing
Cooking pasta
9
stir-frying
Searing
bringing soup to the boil
boiling water
